
Succulent Propagation
From Petal to Plant: Flower-Based Propagation Techniques
Have you ever wondered how a delicate flower transforms into a thriving plant? In this article, we’ll take you on a journey from petal to plant, exploring the fascinating world of flower-based propagation techniques.

From the enchantment of pollination to the art of seed germination and the magic of petal grafting, we’ll unravel the secrets behind growing new life from flowers.
Get ready to unlock the potential of flower offset propagation and learn step-by-step leaf cutting methods.
Let’s dive in and discover the wonders of flower propagation together.
Exploring the Science of Flower Propagation
You can gain a deeper understanding of flower propagation by exploring the science behind it. By studying the pollination techniques and floral reproduction methods, you’ll be able to serve others better in your pursuit of cultivating beautiful and bountiful gardens.
Pollination is a crucial step in flower propagation. It’s the process by which pollen is transferred from the male reproductive parts to the female reproductive parts of a flower. This can happen through various methods, such as wind, water, or pollinators like bees, butterflies, or birds. Understanding these pollination techniques can help you create the ideal conditions for successful propagation.
Floral reproduction methods are also essential to grasp when delving into the science of flower propagation. There are two main methods: sexual reproduction and asexual reproduction. Sexual reproduction involves the fusion of male and female reproductive cells to produce seeds, while asexual reproduction involves the creation of new plants from existing plant parts, such as stems or leaves. Knowing these methods can help you choose the most suitable propagation techniques for different types of flowers.
Understanding the Role of Pollination in Plant Reproduction
Exploring the role of pollination and understanding its importance in plant reproduction can greatly enhance your knowledge of flower-based propagation techniques. Pollination plays a crucial role in the reproduction of plants, and it’s essential to understand how it works to effectively propagate flowers. Here are some key points to consider:
- Role of insects: Insects, such as bees, butterflies, and flies, play a vital role in pollination. They visit flowers in search of nectar and inadvertently transfer pollen from one flower to another. By attracting these insects, you can increase the chances of successful pollination and ultimately improve plant reproduction.
- Self-pollination: Some plants have the ability to self-pollinate, meaning they can fertilize their own flowers without the need for external agents like insects. This mechanism ensures that plants can reproduce even in the absence of pollinators. Understanding which plants are capable of self-pollination can help you select the right species for your propagation efforts.
- Importance of cross-pollination: Cross-pollination occurs when pollen from one flower fertilizes the ovules of another flower. This process promotes genetic diversity and leads to stronger and more resilient plants. By encouraging cross-pollination, you can create new varieties with desirable traits and improve the overall quality of your flowers.
- Enhancing pollination: Creating an environment that attracts pollinators is crucial for successful plant reproduction. You can achieve this by planting a variety of flowers that bloom at different times, providing a continuous source of nectar and pollen. Additionally, avoiding the use of pesticides can help protect pollinators and ensure their role in the pollination process.
Harnessing the Power of Floral Tissue Culture
Now let’s talk about the benefits of harnessing the power of floral tissue culture in plant propagation.
With tissue culture, you can achieve higher success rates in propagating plants compared to traditional methods.
This technique allows for the production of large numbers of genetically identical plants, ensuring uniformity and consistency in your garden or nursery.
Benefits of Tissue Culture
Take advantage of the many benefits of tissue culture in your garden by harnessing the power of floral tissue culture. Tissue culture has numerous applications that can greatly enhance your gardening experience. Here are some reasons why you should consider using tissue culture techniques:
- Increased plant production: Tissue culture allows for mass production of plants, ensuring a bountiful garden that can be enjoyed by many.
- Disease-free plants: Tissue culture techniques ensure that plants are free from diseases, giving you healthy and vibrant plants to showcase in your garden.
- Genetic preservation: Tissue culture allows for the preservation of rare and endangered plant species, contributing to the conservation of biodiversity.
- Year-round propagation: Tissue culture enables year-round propagation, giving you the flexibility to grow your favorite plants regardless of the season.
Propagation Success Rates
Improve your propagation success rates by delving into the power of floral tissue culture.
When it comes to propagating plants through tissue culture, there are both challenges and solutions that can help you achieve higher success rates.
One of the main challenges in propagation is contamination, which can lead to failure. To overcome this, proper sterilization techniques and a controlled environment are crucial.
Another challenge is the requirement for specialized equipment and skills. However, there are solutions available, such as collaborating with tissue culture labs or attending workshops to gain knowledge and access to equipment.
Additionally, maintaining a consistent nutrient medium and providing optimal conditions for growth can greatly increase your success rates.
The Art of Seed Germination From Flower Pods
Now let’s talk about the art of seed germination from flower pods. You’ll be amazed at how important optimal germination conditions are for successful seedling development.
Understanding the anatomy of flower pods is key to ensuring the best germination outcomes.
Optimal Germination Conditions
To achieve successful germination, ensure that your flower pods are placed in the ideal conditions. Here are some important factors to consider:
- Germination Temperature Range: Different flower seeds have different temperature requirements for optimal germination. Providing the right temperature range will encourage faster and more successful germination. This information can usually be found on the seed packet or online resources.
- Moisture Requirements: Keeping the soil consistently moist is crucial for seed germination. Make sure to water the flower pods regularly, but be careful not to overwater as this can lead to rotting or fungal diseases.
- Light Exposure: While some flower seeds require darkness for germination, others need exposure to light. Read the instructions on the seed packet and provide the appropriate amount of light for your flower pods.
- Air Circulation: Good air circulation is important for preventing diseases and mold growth. Place your flower pods in a well-ventilated area to ensure a healthy germination process.
Flower Pod Anatomy
To ensure successful seed germination from your flower pods, it’s important to understand their anatomy and the art behind it.
Flower pods, also known as seed pods, are the protective structures that contain seeds. They come in various shapes and sizes, depending on the plant species.
The structure of a flower pod consists of several parts, including the ovary, which is the lower part of the pistil. Inside the ovary, you’ll find the ovules, which eventually develop into seeds.
As the flower matures, the ovary enlarges and becomes the pod, enclosing the seeds. The development of flower pods is a fascinating process, as it involves the transformation of a flower into a structure capable of producing and protecting seeds.
Successful Seedling Development
For successful seedling development, you’ll need to master the art of germinating seeds from flower pods. It’s a delicate process that requires patience and care, but the rewards are worth it. Here are some tips to help you ensure successful seedling care and nurturing young plants:
- Provide the right environment: Create a warm and moist environment for the seeds to germinate. Keep them in a well-lit area, but not in direct sunlight, as it may scorch the delicate seedlings.
- Water consistently: Keep the soil moist, but not waterlogged. Water regularly to provide the necessary moisture for the seeds to sprout and the seedlings to grow.
- Protect from pests: Take measures to protect your seedlings from pests like insects and animals. Use organic pest control methods to avoid harming the delicate plants.
- Transplant with care: Once the seedlings have grown stronger, carefully transplant them into larger pots or the garden. Handle them gently to avoid damaging the young roots.
Unveiling the Secrets of Petal Grafting
Discover the key steps to successfully grafting petals onto a plant stem. Petal grafting techniques offer a unique way to propagate plants, but they also come with their own set of propagation challenges. However, with the right knowledge and techniques, you can overcome these challenges and create beautiful and healthy plants.
To start the petal grafting process, you’ll need to select a healthy, mature plant with a strong stem. Choose petals from a flower that you wish to propagate and carefully remove them, making sure to include a small portion of the flower’s base.
Next, make a small incision on the stem of the plant, about one inch long. Insert the base of the petals into the incision, making sure they fit snugly. Use grafting tape to secure the petals in place and promote healing.
It is important to keep the grafted plant in a controlled environment with high humidity and low light to promote successful grafting. Mist the plant regularly to maintain humidity levels and prevent the petals from drying out.
After a few weeks, you’ll start to see new growth emerging from the grafted petals. At this point, you can remove the grafting tape and continue to care for the plant as you would with any other.
Nurturing New Life: Flower Stem Cutting Techniques
Now let’s talk about the key points when it comes to nurturing new life through flower stem cutting techniques.
First, you need to consider the optimal cutting length for the stem to ensure successful propagation.
Additionally, it’s crucial to master the proper cutting technique to promote healthy growth and root development.
Optimal Cutting Length
To ensure successful growth, choose a cutting length that’s appropriate for the type of flower you’re propagating. The length of the cutting plays a crucial role in maximizing the success of your propagation efforts. Here are some tips to help you determine the optimal cutting length:
- Consider the maturity of the flower: A mature flower may require a longer cutting length to ensure it has enough energy to develop roots and grow into a new plant.
- Take into account the size of the flower: Larger flowers may need longer cutting lengths to provide enough stem tissue for the development of roots.
- Examine the health of the flower: If the flower is healthy and strong, a slightly shorter cutting length may be sufficient for successful propagation.
- Evaluate the environmental conditions: In challenging growing conditions, such as low light or high humidity, longer cutting lengths may be beneficial to increase the chances of rooting.
Proper Cutting Technique?
With a firm grip and a sharp pair of pruning shears, carefully position the blades just below a leaf node and then make a clean cut, ensuring the stem is at a 45-degree angle. Proper cutting technique is crucial for successful flower stem propagation.
By following these steps, you can increase your propagation success rates and nurture new life in your garden. When making the cut, it’s important to choose a healthy stem that’s free from disease or damage.
Additionally, the optimal cutting length should be approximately 4-6 inches long. This length provides enough room for the plant to develop roots while still maintaining its energy reserves.
Remember to remove any leaves or flowers from the lower portion of the stem to prevent rotting and promote healthy root growth.
Adventurous Adventures in Flower Layering
You should occasionally experiment with flower layering techniques to create new plants from existing ones. Flower layering is a creative propagation technique that allows you to expand your garden and share the beauty of flowers with others.
Here are a few adventurous adventures in flower layering that will ignite your passion for gardening:
- Uncover Hidden Treasures: Layering allows you to discover the hidden potential of your favorite flowers. You can uncover new varieties and colors that will amaze and delight you.
- Nurture Nature: By layering flowers, you aren’t only creating new plants but also nurturing nature. You’re giving life to something beautiful and contributing to the biodiversity of your garden.
- Spread Joy: Imagine the joy on someone’s face when you gift them a unique plant that you have created through layering. It’s a way to share your love for gardening and bring happiness to others.
- Create Lasting Memories: Layering flowers allows you to create memories that will last a lifetime. You can look back and see how your garden has evolved, knowing that you played a part in its growth.
From Bloom to Bulb: Propagating Plants Through Flower Bulbs
By combining the beauty of flowers with the convenience of bulbs, you can easily propagate plants through flower bulbs. Bulb propagation is a simple and effective way to grow new plants from existing ones. But before you start, it’s important to understand the anatomy of a flower bulb.
A flower bulb is made up of several layers. The outermost layer is called the tunic, which protects the bulb from damage and drying out. Inside the tunic, you’ll find the basal plate, which is the bottom part of the bulb where the roots and shoots develop. The scales, located above the basal plate, store food for the developing plant. Lastly, the central shoot, also known as the growing point, is responsible for producing new leaves and flowers.
To propagate plants through flower bulbs, you can use a method called bulb division. This involves carefully separating the bulb into smaller sections and replanting them. Start by digging up the bulbs during their dormant period, usually in late summer or early fall. Gently separate the bulb into individual sections, making sure each section has some scales and a growing point. Then, plant the sections in well-draining soil and water them thoroughly.
The Magic of Floral Division: Splitting Flowers for New Growth
Sometimes, you’ll find that splitting flowers is a magical technique for promoting new growth. By dividing a mature flower into smaller sections, you can create multiple plants that will thrive and bring beauty to your garden. Here are a few reasons why splitting flowers can be such a rewarding experience:
- Increased abundance: Splitting flowers allows you to multiply your plant collection, resulting in a greater number of blooms and a more vibrant garden. It’s a wonderful way to share the beauty of flowers with others and bring joy to their lives.
- Renewed vitality: When you split a flower, you’re giving it a fresh start. Each divided section has the potential to grow stronger and healthier, rejuvenating the plant and ensuring its longevity. It’s like giving a second chance to a struggling flower, allowing it to thrive and flourish.
- Sense of accomplishment: Witnessing the new growth that emerges from the divided sections of a flower can be incredibly rewarding. It’s a tangible reminder of your efforts and the care you’ve put into nurturing the plant. Seeing your garden flourish brings a sense of fulfillment and satisfaction.
- Connection with nature: Splitting flowers is a hands-on process that allows you to connect with nature in a meaningful way. It’s an opportunity to observe the intricate beauty of plants up close and witness the miracle of new life unfolding before your eyes.
Unlocking the Potential of Flower Offset Propagation
One way to unlock the potential of flower offset propagation is by carefully removing the offsets from the parent plant and transplanting them into their own pots. This method offers several benefits for both the plants and the gardener. By separating the offsets, you give them the opportunity to develop their own root system and establish themselves as independent plants. This not only promotes their growth and health, but also allows you to expand your garden or share the offsets with others who desire to serve and beautify their own spaces.
To better understand the benefits of flower offset propagation, let’s take a look at the following table:
| Offset Propagation Benefits | Flower Pod Germination |
|---|---|
| Increases plant population | Promotes new growth |
| Creates more blooming | Ensures genetic diversity |
| opportunities | |
| Provides plants for sharing | |
As you can see, offset propagation benefits both the gardener and the plants. It allows you to multiply your flower collection, create more blooming opportunities, and ensure genetic diversity in your garden. Moreover, it provides you with the chance to share your plants with others, spreading beauty and joy to those who desire to serve and appreciate the wonders of nature.
Flower Propagation Through Leaf Cuttings: A Step-by-Step Guide
To successfully propagate flowers through leaf cuttings, you’ll need a few key materials and follow a step-by-step process. It may seem daunting at first, but with the right guidance, you can easily master the art of leaf propagation. Here is a step-by-step guide to help you get started:
- Prepare your materials: Gather a sharp knife or shears, a clean container with drainage holes, a well-draining potting mix, and rooting hormone powder.
- Choose a healthy leaf: Look for a mature leaf on the plant you wish to propagate. Ensure it’s free from any damage or disease.
- Take the cutting: Using your knife or shears, make a clean cut just below the leaf node, which is where the leaf meets the stem. Aim for a cutting that’s about 4-6 inches long.
- Plant and care for the cutting: Dip the cut end of the leaf into rooting hormone powder and gently tap off any excess. Insert the cutting into the potting mix, making sure it’s secure. Keep the soil moist but not waterlogged, and place the container in a warm and bright location.
By following these simple steps, you can embark on a rewarding journey of leaf propagation. With patience and care, you’ll witness the transformation of a single leaf into a beautiful and thriving plant.
Happy propagating!
Pushing Boundaries: Experiments in Hybridizing Flowers for Propagation
If you want to push the boundaries of flower propagation, you can experiment with hybridizing different flowers to create unique and fascinating varieties. By conducting experiments in crossbreeding, you have the opportunity to discover new and exciting combinations that may not occur naturally. Hybrid flower propagation techniques allow you to take the best traits from different flowers and create something entirely new.
When conducting experiments in hybridizing flowers, it’s important to start with a clear objective in mind. Determine what traits you want to combine and what qualities you hope to achieve in the resulting hybrid. This will help guide your selection of parent plants and ensure that your experiments are purposeful and directed.
Once you have selected your parent plants, you can begin the process of crossbreeding. This involves carefully transferring pollen from one flower to another, ensuring that the desired traits are passed on to the offspring. It may take multiple attempts and careful observation to achieve the desired results, but the process of experimentation can be both rewarding and educational.
Frequently Asked Questions
How Long Does It Typically Take for a Flower to Propagate Through Leaf Cuttings?
It typically takes a few weeks for a flower to propagate through leaf cuttings. The success rate of leaf cuttings depends on various factors like proper care, humidity, and temperature.
Can Flower Offset Propagation Be Used for All Types of Flowers, or Are There Specific Species That It Works Best With?
Flower offset propagation can be used for a variety of flowers, but certain species may yield better results. The benefits of flower layering include creating new plants from existing ones, increasing your garden’s diversity, and saving money.
Are There Any Special Techniques or Equipment Needed for Floral Division When Splitting Flowers for New Growth?
To split flowers for new growth, you’ll need some special techniques and equipment. Don’t worry, it’s not complicated. Just make sure you have sharp scissors and a clean, sterile container.
What Are Some Common Challenges or Difficulties That Arise When Germinating Seeds From Flower Pods?
Do you ever wonder what challenges arise when germinating seeds from flower pods? Difficulties may include inconsistent germination rates, seed dormancy, and maintaining proper moisture levels. Overcoming these obstacles is crucial for successful propagation.
Can Flower Layering Be Used to Propagate Flowers That Do Not Naturally Produce Nodes or Runners?
Yes, flower layering can be a useful technique for propagating flowers that don’t naturally produce nodes or runners. It allows you to create new plants from existing ones by burying the stems and encouraging root growth.
Author

Succulent Propagation
Mastering the Art of Leaf Propagation for Succulents
Are you ready to dive into the world of leaf propagation and elevate your succulent game?

Get ready to unlock the secrets of mastering the art of leaf propagation for succulents.
In this article, we will guide you through the steps and techniques to successfully propagate your own succulents from leaves.
From selecting healthy leaves to caring for newly propagated plants, we’ve got you covered.
Get your green thumbs ready and let’s get started!
Understanding Leaf Propagation Basics
If you want to successfully propagate succulents from leaves, there are a few basic principles you need to understand. Leaf propagation techniques play a crucial role in expanding your succulent collection.
First and foremost, choose healthy leaves for propagation. Look for leaves that are plump, firm, and free from any signs of damage or disease. Once you have selected the perfect leaves, gently twist them off the stem, making sure to include the entire leaf, including the base.
Next, let the leaves dry out for a few days to allow calluses to form on the cut ends. This callusing process is essential for successful propagation.
After the leaves have callused, it’s time to prepare the soil for planting. Use well-draining soil specifically formulated for succulents. Mix in some perlite or sand to improve drainage further. Make small holes in the soil and place the leaf cuttings in, burying the base of the leaves slightly. Water the soil lightly, making sure not to overwater, as succulents are prone to root rot. Keep the soil consistently moist but not drenched, and avoid direct sunlight during the initial stages of leaf propagation.
Now that you know the leaf propagation techniques, let’s discuss the leaf propagation success factors. One crucial factor is temperature. Succulents thrive in warm environments, so maintaining a temperature between 70-80°F (21-27°C) is ideal. Another success factor is patience. Leaf propagation takes time, and it may take several weeks or even months for roots to develop and new plants to emerge. Lastly, providing the right amount of light is crucial. Place your leaf cuttings in a bright location with indirect sunlight.
Selecting Healthy Leaves for Propagation
To successfully propagate succulents through leaf propagation, it’s crucial to select healthy leaves. Look for indicators of leaf health such as plumpness, firmness, and vibrant color. Optimal leaf selection ensures higher chances of successful propagation and the growth of healthy new plants.
Additionally, understanding common troubleshooting issues in leaf propagation can help you identify and address any problems that may arise during the process.
Leaf Health Indicators
You can easily identify healthy leaves for propagation by looking for certain indicators of leaf health. Recognizing leaf diseases and preventing leaf damage are crucial for successful propagation. Here are some key indicators to look for when selecting leaves for propagation:
| Indicator | Healthy Leaf |
|---|---|
| Color | Vibrant and uniform |
| Texture | Firm and plump |
| Size | Fully grown and intact |
| Shape | Undamaged and symmetrical |
| Condition | Free from spots, holes, or other signs of diseases |
Optimal Leaf Selection
How can you ensure that the leaves you select for propagation are healthy and optimal for successful growth?
When it comes to leaf propagation, selecting the right leaves is crucial for ensuring a successful outcome. To increase your chances of success, here are some leaf selection techniques and leaf propagation success tips that you can follow.
First, choose leaves that are plump, firm, and free from any signs of damage or disease. Look for leaves with vibrant colors and no blemishes.
Additionally, select leaves that are mature and fully grown, as younger leaves may not have enough energy to develop into new plants.
Troubleshooting Leaf Propagation
When propagating succulent leaves, it’s important to carefully select healthy leaves that are free from any signs of damage or disease and are fully grown. By choosing the right leaves, you can increase the chances of successful propagation and ensure the growth of healthy new plants.
Here are some tips to help you troubleshoot leaf propagation:
- Common leaf problems:
- Look for leaves with brown or black spots, as these may indicate fungal or bacterial infections. Avoid using such leaves for propagation.
- Check for leaves that are shriveled or discolored, as these may be a sign of nutrient deficiencies or overwatering.
- Avoid using leaves that are already damaged or have been chewed on by pests, as they may not have enough energy to produce new roots.
- Preventing leaf rot:
- Make sure to let the leaves callus over before placing them in soil or water for propagation. This will help prevent rotting.
- Use well-draining soil and water sparingly to avoid excessive moisture, which can lead to rot.
- Provide proper air circulation to prevent the buildup of moisture around the leaves.
Preparing the Leaves for Propagation
Now let’s talk about how to prepare the leaves for propagation.
This step is crucial in ensuring successful growth and development of new succulent plants.
Leaf Preparation Techniques
To achieve successful leaf propagation for your succulents, it’s important to properly prepare the leaves beforehand. Leaf preparation techniques play a crucial role in increasing your chances of leaf propagation success and overcoming leaf propagation challenges. Here are some techniques you can follow:
- Select healthy leaves: Choose leaves that are plump, firm, and free from any signs of damage or disease.
- Allow leaves to callous: After removing the leaves from the parent plant, let them sit in a dry, shaded area for a few days until a callus forms over the cut end. This will help prevent rotting.
- Trim the leaves: If the leaves are large, you can trim them to a more manageable size. This will reduce the risk of water loss and allow the leaf to allocate energy towards root development.
Optimal Leaf Selection
To increase your chances of successful leaf propagation for your succulents, it’s important that you carefully select the optimal leaves for propagation. Here are some leaf selection tips to help you get started.
First, choose leaves that are plump and healthy-looking. These leaves are more likely to have the necessary nutrients and energy to grow new roots and eventually develop into new plants. Avoid leaves that are damaged, shriveled, or discolored, as these may not have the vitality needed for successful propagation.
Additionally, make sure to select leaves that are fully grown and mature, as younger leaves may not have enough energy reserves to support new growth.
Choosing the Right Propagation Medium
You should consider using a well-draining potting mix as the ideal propagation medium for your succulent leaf cuttings. This type of medium provides the right balance of moisture retention and drainage, allowing the roots to develop properly. Here are some reasons why a well-draining potting mix is the best option:
- Prevents Root Rot: Succulents are prone to root rot if their roots sit in water for too long. A well-draining potting mix helps prevent this by allowing excess water to flow out of the container, keeping the roots healthy and dry.
- Promotes Healthy Growth: The loose and airy nature of a well-draining potting mix allows for better aeration and root development. This helps the succulent cuttings establish themselves and grow stronger.
- Reduces the Risk of Disease: Using a well-draining medium reduces the chances of fungal and bacterial diseases that thrive in overly moist conditions. This helps maintain the overall health of your succulent plants.
While there are alternative options for propagation mediums such as sand or perlite, a well-draining potting mix provides a balanced environment for successful leaf propagation. It’s readily available and easy to use, making it the ideal choice for beginners and experienced gardeners alike.
Planting Succulent Leaves for Propagation
Start by selecting a few healthy succulent leaves for propagation.
When it comes to planting succulent leaves for propagation, there are a few techniques you can try.
One method is to simply lay the leaves on top of well-draining soil. Make sure to choose a soil mix specifically formulated for succulents. Gently press the leaves into the soil so they make good contact.
Another technique is to partially bury the leaves by inserting the stem end into the soil. This will help anchor the leaf and encourage root growth.
Whichever method you choose, it’s important to keep the soil slightly moist but not overly wet. Too much moisture can lead to rotting.
Place the planted leaves in a bright location, but avoid direct sunlight.
Over time, you’ll start to see new roots forming and tiny plantlets emerging from the base of the leaves. Be patient and resist the urge to disturb the leaves during this process.
With these leaf propagation techniques, you’ll soon have a new generation of succulents to enjoy and share with others.
Providing the Ideal Growing Conditions
For optimal growth, ensure that your succulents are provided with plenty of sunlight and water, as well as a well-draining soil. Here are some tips on how to create the ideal growing conditions for your succulent plants:
- Ideal Temperature: Succulents thrive in warm temperatures, ideally between 70 to 85 degrees Fahrenheit (21 to 29 degrees Celsius). Make sure to keep them away from drafts or extreme temperature changes, as they can be sensitive to those.
- Proper Lighting: Succulents require bright light to grow and thrive. Place them in a location where they can receive at least six hours of sunlight each day. If you’re growing them indoors, choose a spot near a south-facing window or use artificial grow lights to provide adequate light.
- Well-Draining Soil: Succulents prefer a soil mix that allows excess water to flow out easily, preventing root rot. Use a well-draining potting mix specifically formulated for succulents or create your own by mixing coarse sand, perlite, and potting soil.
Remember to water your succulents thoroughly, allowing the soil to dry out completely between waterings. With the right growing conditions, your succulents will flourish and bring beauty to your space. Happy gardening!
Watering Techniques for Successful Propagation
Now it’s time to talk about watering techniques that will ensure successful propagation for your succulents.
You need to pay attention to the moisture levels of the soil, deciding whether to mist or soak your plants, and determining the frequency of watering.
Soil Moisture Levels
To ensure successful propagation of your succulents, it’s important to maintain proper soil moisture levels through effective watering techniques. Proper moisture control is vital as succulents are adapted to arid environments and can be sensitive to overwatering. Here are some tips to help you maintain the right soil moisture levels for your succulent leaf propagation:
- Watering frequency: Succulents prefer infrequent but deep watering. Water the soil thoroughly and then let it dry out completely before watering again. This will encourage the succulent to develop a strong root system.
- Avoid overwatering: Succulents store water in their leaves and stems, so they’re susceptible to root rot if the soil remains too wet. Make sure the soil is well-draining to prevent waterlogged conditions.
- Monitor moisture levels: Regularly check the moisture level of the soil by sticking your finger into it. If it feels dry up to your first knuckle, it’s time to water. However, if it feels moist, hold off on watering to prevent overwatering.
Mist Vs. Soak
You can choose between misting or soaking as your preferred watering technique for successful succulent propagation. Both mist propagation and soaking are effective ways to provide water to your succulent cuttings or leaves.
Misting involves spraying a fine mist of water onto the leaves, while soaking means submerging the cuttings or leaves in water for a short period of time.
Misting is a gentle and gradual way to provide moisture to your succulents. It helps to prevent overwatering and allows the leaves to absorb water slowly.
On the other hand, soaking can be more efficient in delivering water to the roots, especially for larger cuttings or leaves. It ensures that the entire cutting is evenly hydrated.
Ultimately, the choice between misting and soaking depends on your personal preference and the needs of your succulent. Some succulent enthusiasts find success with misting, while others prefer soaking.
Experiment with both techniques and observe how your succulents respond to find the best watering technique for your plants. Remember to always monitor the moisture levels and adjust accordingly to maintain a healthy and thriving succulent garden.
Frequency of Watering
For optimal propagation success, it’s important to determine the appropriate frequency of watering for your succulents. Proper watering techniques play a crucial role in the health and growth of your propagated succulents.
Here are some tips to help you master the art of watering:
- Observe the soil moisture: Check the moisture level of the soil before watering. Succulents prefer dry soil, so ensure it has dried out before watering again.
- Water deeply, but infrequently: When you do water, make sure you thoroughly saturate the soil, allowing the water to reach the roots. However, succulents don’t need frequent watering, so allow the soil to dry out completely between waterings.
- Adjust watering based on the season: During the hot summer months, your succulents may need more frequent watering. In contrast, during cooler months, reduce watering to once every few weeks.
Monitoring for Root Development
An important step in propagating succulents from leaves is monitoring the development of roots. As you serve your succulents, it’s crucial to keep a close eye on the root growth to ensure their overall health and successful propagation. Monitoring root growth allows you to see if the leaf is successfully producing roots and taking in water and nutrients from the soil.
To monitor root development, gently lift the leaf and observe the base where the roots should form. Look for signs of healthy root development, such as the appearance of small white or pale-colored roots. These roots indicate that the leaf is establishing a strong connection with the soil and is ready to be transplanted into a pot. If you notice any mushy or discolored roots, it may be a sign of root rot, and you should take immediate action to prevent further damage.
In addition to visually inspecting the roots, you can also gently tug on the leaf to check for resistance. If the leaf resists being pulled out, it means the roots have developed a strong grip in the soil. On the other hand, if the leaf easily comes out, it may indicate weak or insufficient root development.
Recognizing Signs of Successful Propagation
If you see new growth or sprouting from the leaf, it’s a definite sign of successful propagation. Recognizing signs of propagation success is crucial for expanding your succulent collection. Here are some troubleshooting techniques and advanced methods to help you identify the signs:
- Observing the leaf: Look for changes in the leaf’s appearance, such as increased plumpness or a vibrant color. These are indicators that the leaf is successfully propagating.
- Root development: Gently lift the leaf and check for the presence of roots. Well-established roots indicate successful propagation and a healthy plant.
- Leaf health indicators: Healthy leaves will show signs of growth, such as new leaves sprouting from the base. Additionally, a firm and turgid leaf is a positive sign.
Recognizing signs of successful propagation allows you to avoid common mistakes and ensure optimal conditions for your succulent variety. Remember to provide proper watering techniques, as overwatering can hinder propagation success. By monitoring the signs and adjusting care accordingly, you can expand your succulent collection with confidence.
Troubleshooting Common Leaf Propagation Issues
To address common leaf propagation issues, you can identify the problem and take appropriate steps to resolve it. Troubleshooting leaf propagation problems can be challenging, but with a little patience and knowledge, you can overcome these obstacles and achieve successful propagation. Here are some common issues you may encounter and how to troubleshoot them:
| Common Problem | Possible Cause | Solution |
|---|---|---|
| Leaves not rooting | Lack of moisture | Mist the leaves regularly to keep them moist. |
| Incorrect temperature | Ensure the temperature is suitable for root development. | |
| Leaves rotting | Overwatering | Reduce watering frequency and allow the leaves to dry out between waterings. |
| Poor drainage | Ensure the potting mix is well-draining. | |
| Leaves shriveling | Underwatering | Increase watering frequency and ensure the leaves are adequately hydrated. |
| Lack of sunlight | Place the leaves in a bright location with indirect sunlight. |
Transferring Propagated Succulents to Individual Pots
Once your propagated succulents have developed roots and are ready for transplanting, you can transfer them to individual pots. This step is crucial in ensuring the growth and health of your succulents. Here’s how you can successfully repot your succulent cuttings:
- Choose the right pot: Select a pot that’s slightly larger than the root system of your propagated succulent. This will allow room for growth while preventing the soil from staying too wet.
- Prepare the soil: Use a well-draining soil mix specifically formulated for succulents. You can also mix in perlite or sand to improve drainage.
- Gently remove the succulent pups or cuttings from the propagation tray, taking care not to damage the delicate roots. If the roots are intertwined, gently separate them, ensuring each plant has its own root system.
- Place the succulent into the new pot, making sure the roots are spread out evenly. Add soil around the roots, gently pressing it down to provide stability.
- Water sparingly: After repotting, wait a few days before watering to allow the roots to settle. When you do water, give the succulent a thorough soak, allowing excess water to drain away.
By following these steps, you can successfully transfer your propagated succulents to individual pots, promoting their growth and ensuring their long-term health.
Happy gardening!
Caring for Newly Propagated Succulents
Take a moment to carefully observe and nurture your newly propagated succulents, as they require attentive care in their early stages of growth.
After transferring them to individual pots, it’s important to help them acclimate to their new environment. This acclimation process allows the succulents to adjust to their new surroundings and ensures their survival.
During the acclimation process, it’s crucial to monitor the moisture levels of the soil. Succulents are prone to rot, especially when they’re young and delicate. To prevent rot, avoid overwatering the newly propagated succulents. Only water them when the soil is completely dry. This will help the roots establish and grow without the risk of becoming waterlogged.
Additionally, provide the succulents with the right amount of light. Place them in a location where they can receive bright, indirect sunlight. Too much direct sunlight can scorch the leaves, while too little light can cause the plants to stretch and become weak. Finding the right balance will promote healthy growth and vibrant colors.
Lastly, keep an eye out for any signs of stress or disease. Look for any discoloration, wilting, or pest infestation. If you notice any issues, promptly address them to ensure the well-being of your newly propagated succulents.
Propagation Tips for Different Succulent Varieties
Now let’s talk about the best propagation techniques for different succulent varieties.
Firstly, it’s important to consider the type of succulent you are working with. Some succulents, such as echeverias and sedums, can be easily propagated from leaf or stem cuttings.
Leaf propagation involves carefully removing a healthy leaf from the mother plant and allowing it to callous over for a few days before placing it on well-draining soil. Over time, new roots and leaves will develop from the base of the leaf.
Stem propagation, on the other hand, involves cutting a healthy stem and allowing it to callous over before placing it in well-draining soil. Again, new roots and leaves will eventually sprout from the cut end of the stem.
Other succulents, like haworthias and gasterias, can be propagated by division. This means separating the offsets, or “pups,” that grow at the base of the mother plant. Each pup can be planted in its own pot and will grow into a new succulent.
When propagating succulents, it’s important to consider a few key factors. First, make sure to use well-draining soil to prevent root rot. Succulents prefer soil with a high percentage of sand or perlite to ensure good drainage.
Secondly, provide your succulents with adequate light. Most succulents thrive in bright, indirect light, so placing them near a window or under a grow light is recommended.
Lastly, be patient. Succulent propagation takes time, and it may be several weeks or even months before you see significant growth.
Now that you know the best propagation techniques for different succulent varieties and some important considerations, let’s discuss common propagation mistakes to avoid.
Best Propagation Techniques
To achieve optimal results, use these helpful propagation techniques to propagate different varieties of succulents.
Here are some innovative propagation methods that can help you overcome leaf propagation challenges:
- Water Propagation: Place the leaf cuttings in a container with water, ensuring that the bottom of the cutting is submerged. Change the water regularly to prevent rotting and promote root growth.
- Soil Propagation: Dip the cut end of the leaf cutting in rooting hormone powder and plant it in well-draining soil. Keep the soil slightly moist but not overly wet to avoid root rot.
- Direct Planting: For succulents with plump leaves, such as echeverias, you can directly plant the leaf cutting into the soil without water propagation. Ensure the soil is well-draining and mist the cutting occasionally to keep it hydrated.
Succulent Variety Considerations
When propagating different succulent varieties, you can consider factors such as sunlight requirements and growth habits. Succulent propagation tips can vary depending on the specific variety you’re working with.
Some succulents, like Echeveria and Sedum, prefer bright sunlight and can be propagated by selecting leaf cuttings. Simply remove a healthy leaf from the mother plant, let it callous for a few days, and then place it on well-draining soil.
Other varieties, like Haworthia and Gasteria, prefer indirect sunlight and can be propagated by division or offsets. These succulents produce small plantlets around the base of the mother plant, which can be separated and planted individually.
Common Propagation Mistakes
Avoid making these common propagation mistakes when working with different succulent varieties.
To ensure successful leaf propagation, keep the following tips in mind:
- Choose healthy leaves: Always select plump, undamaged leaves for propagation. Leaves that are shriveled or damaged won’t produce viable offspring.
- Provide proper lighting: Succulents need adequate sunlight to grow, but avoid placing newly propagated leaves in direct sunlight. Gradually introduce them to brighter light to prevent sunburn.
- Avoid overwatering: While succulents require water, overwatering can lead to rot. Water sparingly and allow the soil to dry out between waterings.
Troubleshooting leaf propagation and transferring propagated succulents can be challenging at times, but by following these tips, you can increase your chances of success and enjoy a garden filled with beautiful, thriving succulents.
Expanding Your Succulent Collection Through Leaf Propagation
You can easily grow your succulent collection by propagating leaves. Leaf propagation techniques are a simple and cost-effective way to expand your succulent collection and share the beauty of these plants with others.
One of the most popular methods is leaf propagation, where you take a healthy leaf from a mature succulent and encourage it to grow roots and a new plant. To start, gently twist or cut a leaf from the stem of your succulent, making sure to leave a clean break. Allow the leaf to dry for a few days until the cut end forms a callus.
Once the callus has formed, place the leaf on well-draining soil and mist it lightly with water. Over time, the leaf will develop roots and a new plant will start to grow. It’s important to be patient during this process, as it can take several weeks or even months for the new plant to establish itself.
Advanced Techniques for Leaf Propagation Success
By carefully monitoring the moisture levels and providing adequate light, you can significantly increase the success rate of leaf propagation for your succulents.
To further enhance your leaf propagation success, try these advanced techniques:
- Experiment with Different Soil Mixes: Use a well-draining soil mix specifically formulated for succulents. You can create your own mix by combining equal parts of potting soil, perlite, and coarse sand. This will provide the ideal growing conditions for your propagated leaves.
- Use Rooting Hormones: Applying a rooting hormone to the cut end of the leaf before planting can stimulate root growth and speed up the propagation process. Look for a hormone powder or gel specifically designed for succulents.
- Provide Bottom Heat: Placing your leaf cuttings on a heated mat or using a propagation heat mat can help accelerate root development. The gentle warmth will encourage faster growth and increase your chances of success.
Frequently Asked Questions
How Long Does It Take for Succulent Leaves to Develop Roots During Propagation?
It usually takes about 2-4 weeks for succulent leaves to develop roots during propagation. Factors like temperature, humidity, and watering frequency can affect root development. Techniques like using rooting hormone and providing bottom heat can speed up root development.
Can I Propagate Succulent Leaves in Water Instead of Using a Propagation Medium?
Yes, you can propagate succulent leaves in water instead of using a propagation medium. Water propagation is an alternative method that allows you to easily observe root development and is a popular choice for many succulent enthusiasts.
Is It Necessary to Remove the Lower Leaves From the Stem Before Propagating Succulents?
Before propagating succulents, you might wonder if removing lower leaves is necessary. Well, pruning techniques can help you thrive! Explore alternative propagation methods and find what works best for you.
What Are Some Common Signs of Unsuccessful Leaf Propagation?
If your leaf propagation isn’t going well, there are common signs to look out for. Leaves that turn mushy or develop mold may indicate unsuccessful propagation. Troubleshoot by adjusting watering and light conditions.
Can I Propagate Succulent Leaves During the Winter Months?
Yes, you can propagate succulent leaves during the winter months. However, winter propagation can be challenging due to lower light levels and cooler temperatures. The best techniques for winter leaf propagation include using a grow light and keeping the cuttings warm.
Author
Succulent Propagation
Growing From Seeds: The Ultimate Guide to Baby Succulents
Ready to embark on the journey of growing your own baby succulents? Look no further! In this ultimate guide, we will walk you through every step of the process, from selecting the perfect seeds to caring for your little green babies.

With our expert tips and tricks, you’ll have a flourishing succulent garden in no time. So, grab your gardening gloves and get ready to witness the miracle of life as you nurture these tiny succulent seeds into beautiful plants.
Let’s get started!
Selecting the Right Seeds for Baby Succulents
You should start by researching and comparing different seed varieties for your baby succulents. It’s important to choose the right seeds that will thrive in your specific environment. Look for varieties that are known to be resilient and adaptable, as succulents require well-draining soil and can withstand dry conditions.
When it comes to choosing the right soil for your baby succulents, opt for a well-draining mix specifically formulated for succulents. This type of soil allows excess water to flow freely, preventing root rot and other moisture-related issues. Avoid using regular potting soil, as it tends to retain too much moisture, which can be harmful to succulents.
To ensure successful germination of your succulent seeds, follow these tips. First, soak the seeds in water for a few hours to help soften the outer shell and promote germination. Next, place the seeds on top of the soil and lightly press them down, ensuring good soil contact. Mist the soil with water to keep it moist but not overly wet. Finally, cover the pot with a clear plastic wrap or a dome to create a mini greenhouse effect and maintain humidity.
Preparing the Ideal Growing Environment
To create the ideal growing environment for your baby succulents, it’s important to consider factors such as light, temperature, and airflow. Providing these elements in the right balance will ensure the health and growth of your succulents.
Here are some tips on how to prepare the perfect environment for your baby succulents:
- Creating a succulent terrarium: A succulent terrarium is a great way to create a controlled environment for your baby succulents. It helps retain moisture and provides the necessary humidity for their growth. Choose a glass container with good drainage and fill it with well-draining soil.
- The benefits of using grow lights for succulents: Succulents thrive in bright, indirect light. If you don’t have access to enough natural sunlight, consider using grow lights. These lights mimic the spectrum of natural sunlight and provide the necessary light intensity for your succulents to thrive.
- Monitoring temperature: Succulents prefer temperatures between 60 and 80 degrees Fahrenheit. Avoid exposing them to extreme heat or cold, as it can cause damage to their leaves and roots.
- Ensuring proper airflow: Good airflow is essential for preventing fungal diseases and promoting healthy growth. Avoid overcrowding your succulents and place them in a well-ventilated area.
Step-by-Step Guide to Sowing Succulent Seeds
To successfully sow succulent seeds, gather the necessary materials and follow these step-by-step instructions.
First, you’ll need a well-draining potting mix specifically designed for succulents. Fill a small tray or pots with the potting mix, leaving some space at the top for watering.
Next, sprinkle the succulent seeds evenly across the surface of the soil. Avoid overcrowding the seeds, as this can lead to competition for nutrients and space. Gently press the seeds into the soil using your fingertips to ensure good soil-to-seed contact.
Afterward, mist the surface of the soil with water to settle the seeds in place. Cover the tray or pots with a clear plastic lid or plastic wrap to create a humid environment, which aids germination.
Place the tray or pots in a warm location with indirect sunlight. Check the soil moisture regularly and mist as needed to keep it slightly damp. Be patient, as succulent seeds can take several weeks to germinate.
Once the seedlings have emerged, remove the plastic cover and provide them with more sunlight gradually. Keep an eye out for common seedling problems such as damping-off, which is a fungal disease that causes the seedlings to wilt and collapse.
Should you encounter any issues, consult a gardening expert or refer to online resources for guidance.
Nurturing Baby Succulents: Watering and Light Requirements
How often should baby succulents be watered and what kind of light do they need? Proper watering and optimal light conditions are crucial for the healthy growth of baby succulents. Here’s what you need to know:
- Watering frequency: Baby succulents have small root systems and are more susceptible to overwatering. It’s important to water them sparingly to avoid root rot. Water your baby succulents only when the soil is completely dry. Stick your finger about an inch deep into the soil, and if it feels dry, it’s time to water. Remember, it’s better to underwater than overwater.
- Optimal light conditions: Succulents thrive in bright, indirect light. Place your baby succulents near a south or east-facing window where they can receive plenty of sunlight. If you don’t have access to natural light, you can use fluorescent grow lights placed 6-12 inches above the plants. Avoid exposing them to direct sunlight for extended periods as it can cause sunburn.
Transplanting and Caring for Baby Succulents
When caring for baby succulents, it’s important to transplant them into larger pots as they grow. Transplanting not only provides more space for their roots to grow but also helps prevent transplant shock, a common problem with baby succulents. Transplant shock occurs when succulents are moved from one pot to another, causing stress and potential damage to their delicate root systems.
To transplant your baby succulents, start by selecting a pot that’s slightly larger than their current one. Ensure that the new pot has drainage holes to prevent water from pooling and causing root rot. Gently remove the succulent from its current pot by loosening the soil around its roots. Place the succulent in the new pot, making sure that the roots are spread out evenly. Fill the pot with a well-draining soil mix, such as a combination of potting soil and perlite, and gently press it down to secure the succulent in place.
After transplanting, it’s crucial to care for your baby succulents properly. Place them in an area with bright, indirect sunlight and water them sparingly. Overwatering is a common problem with baby succulents, as their small root systems are susceptible to rot. Allow the soil to dry out completely between waterings, and be cautious not to pour water directly onto the leaves to avoid causing damage.
By transplanting and providing the right care, you can ensure that your baby succulents thrive and grow into beautiful, mature plants. Remember to monitor them closely for any signs of stress or common problems, such as leaf discoloration or wilting, and make adjustments to their care as needed.
With a little love and attention, your baby succulents will flourish and bring joy to your space.
Frequently Asked Questions
How Long Does It Typically Take for Succulent Seeds to Germinate?
Succulent seeds typically take about 1-3 weeks to germinate. To speed up the process, ensure they have proper light, temperature, and moisture. Remember, patience is key when growing succulents from seeds.
Can I Use Regular Potting Soil to Sow Succulent Seeds?
Yes, you can use regular potting soil to sow succulent seeds, but it’s best to mix it with perlite or sand for better drainage. Following these best practices will increase your chances of successful germination.
Are There Any Specific Temperature Requirements for Successfully Germinating Succulent Seeds?
To successfully germinate succulent seeds, it’s important to consider the temperature requirements. Optimal temperature for germination is around 70-75°F. Maintaining a consistent temperature will help your baby succulents grow strong and healthy.
What Are Some Common Challenges or Problems That Arise When Growing Succulents From Seeds?
When growing succulents from seeds, common challenges may arise such as a lack of germination or slow growth. Don’t worry though, with proper care and attention, you can overcome these obstacles and watch your baby succulents thrive.
Can I Propagate Succulents From Leaves Instead of Starting From Seeds?
You can definitely propagate succulents from leaves! It has its advantages, like faster growth and a higher success rate. But starting from seeds has its own benefits too, like a wider variety of plants to choose from.
Author

Creating Mood Corners With Tonal Succulent Palettes

Crafting Mesmeric Water Features With Aquatic Succulents

Edgy Decor: How Succulents Meet Industrial Design Aesthetics

Rustic Charms: Barn-Style Decor With Hardy Succulents

The Magic of Illuminated Succulent Displays After Dark

The Secret to Awe-Inspiring Succulent Table Runners

How Decorative Succulents Elevate Boutique Hotel Ambiance

Bold Statements: Large Succulents in Home Entrances

Under the Spotlight: Dramatic Lighting and Succulent Displays

Tiny Wonders: Micro Succulents in Dainty Decor Settings

The Charm of Mismatch: Odd Succulents for Eclectic Spaces

Travel-Inspired Rooms With Geographical Succulent Choices

Steal the Show With Award-Winning Succulent Arrangements

Futuristic Vibes: Next-gen Decor Ideas Using Rare Succulents

Reinventing Tradition: Succulents in Classic European Decor

Essential Questions for Nurseries Before You Splurge

The Overharvesting Dilemma in Succulent Trade

Winter Warriors: Cold-Weather Care for Hardy Succulents

Exploring Hidden Gems: Alternative Succulent Buying Venues

Light Loves: Finding the Perfect Sunlight Balance

Rust Spots on Succulents: Causes, Concerns, and Cures

Mother of Thousands: A Medicinal Marvel in Succulent Form

The Culprit Behind Wilting Succulents and How to Intervene

Combatting Common Fungal Issues in Succulents

A Brief History of Medicinal Succulents in Ancient Cultures

Indoor Temperature and Your Succulents: Finding Balance

The Science Behind Perfect Succulent Soil
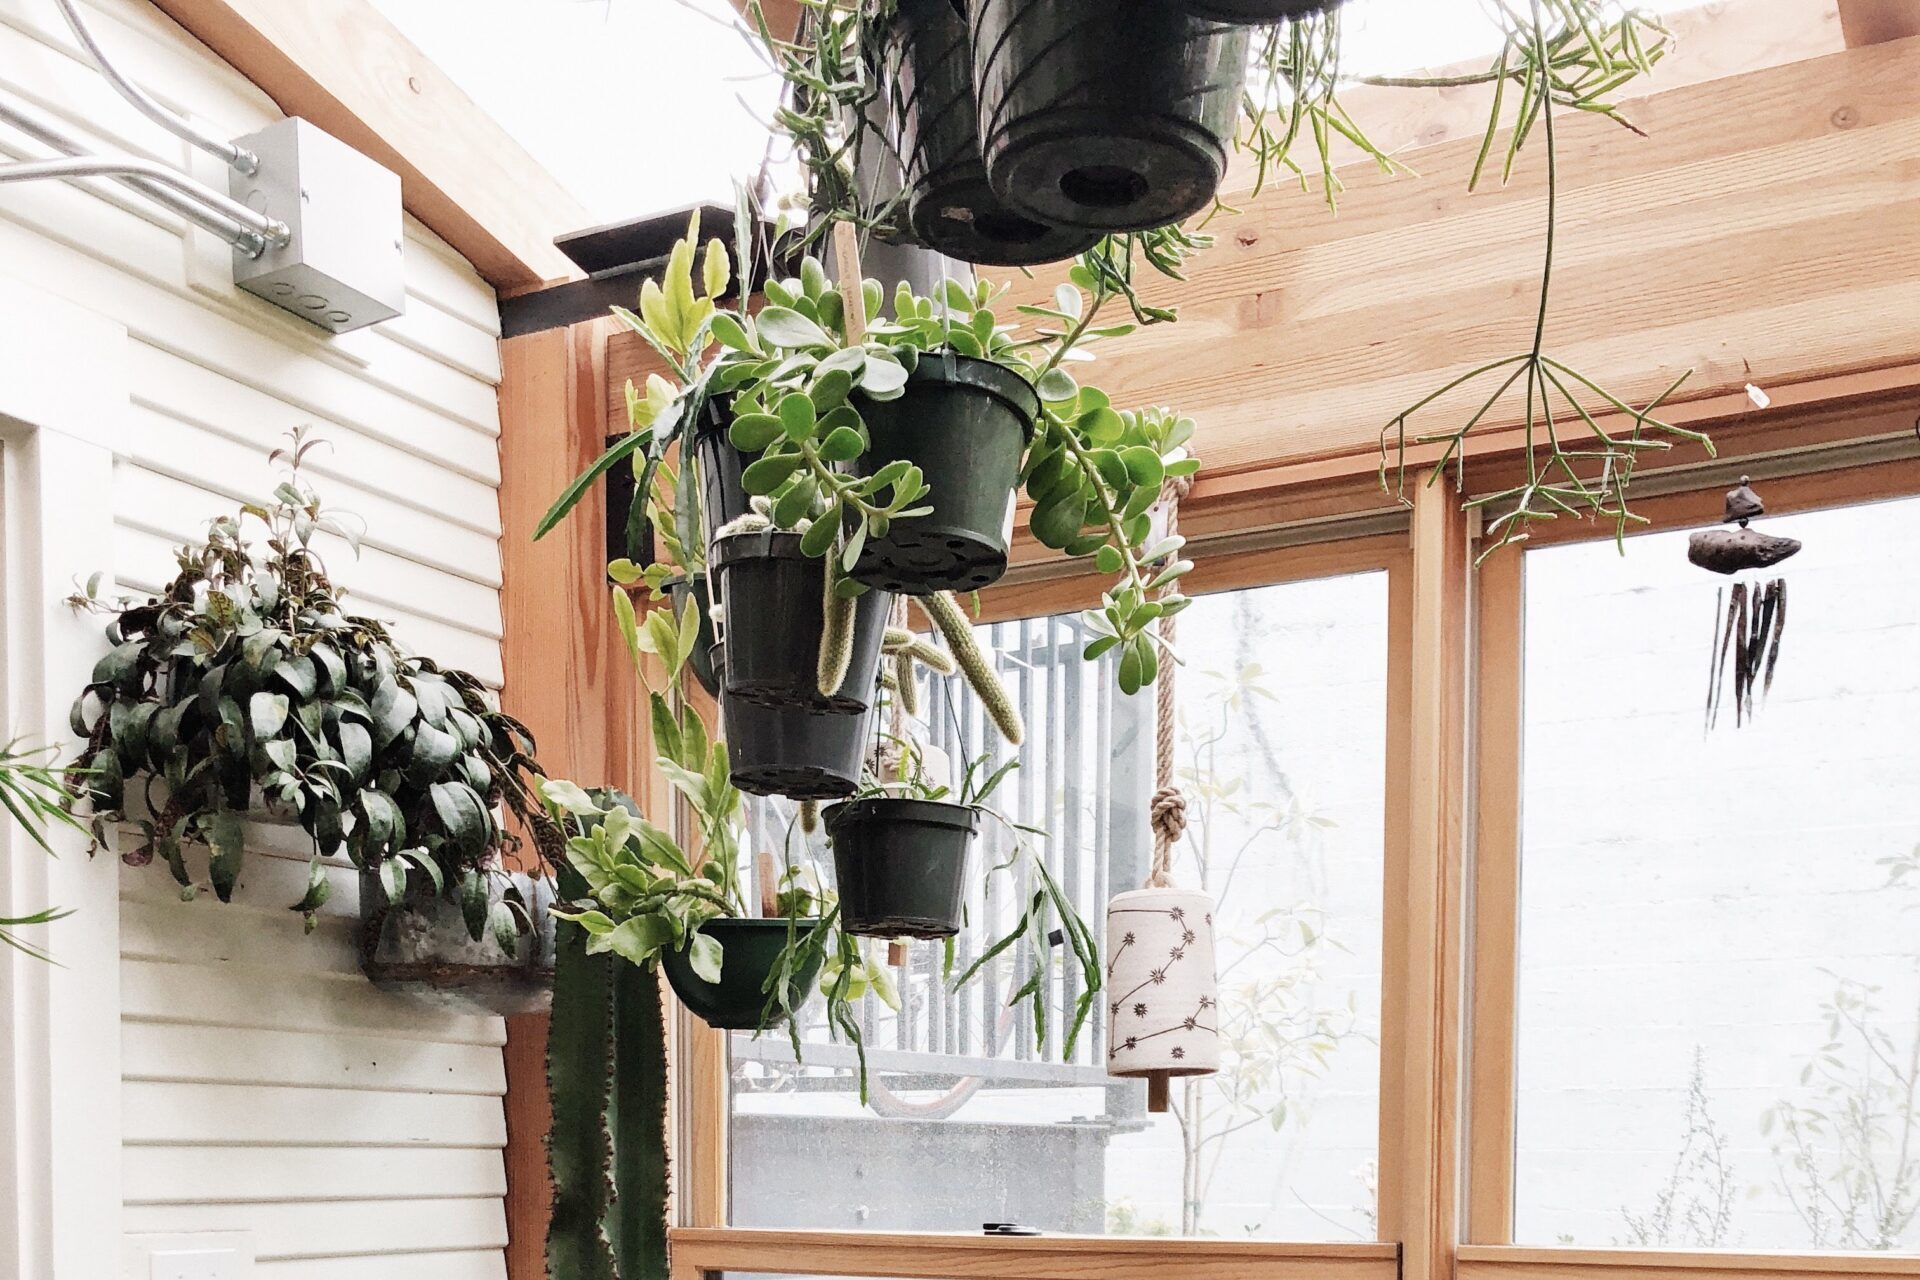
How Hanging Succulents Can Dangle Magic in Interiors

Conquering Cold: Winter Protection for Outdoor Succulents

Healing Powers: Aloe Vera and Other Medicinal Succulents

Harnessing Humidity: Creating the Perfect Propagation Environment

Watering Wisdom: Hydration Tips for Thriving Succulents

Signs of Stress: Recognizing and Addressing Succulent Distress

Bacterial Woes: Keeping Your Succulents Safe
Winter Warriors: Cold-Weather Care for Hardy Succulents

Your Ultimate Guide To Succulents

Succulent Success: Top Varieties for Novice Gardeners

Container Stars: Easy-to-Grow Potted Succulent Wonders

Common Propagation Pitfalls and How to Avoid Them
